I recently moved into my first house (a 3 bed mid terrace, with rear access) and the property did not have a garage so the first job was to build one. After spending years in a small single garage I decided that I would build one as big as possible. In the UK planning permission and building regulations limits just what you can and can not do. Basically if it is below 30m square in area you do not require building regulations. Planning permission is not required if it is more than 5m from the house, takes up less than 1/2 the garden and is less than 4m high if it has a pitched roof. The layout of my garden (5m wide) dictated that the garage would be 4m wide (internally). I wanted to keep a path down the side of the garage. The length of the garage was determined by the length of the building blocks I was using. I did not want to have to cut blocks for every course. The length worked out to be 7m long internally, giving an area of 28m square.
I intended to have a pitched roof as this gave space in the loft for storage. I like my garage to be clear and tidy so all storage of parts etc will be in the loft. I will also divide the loft space into 3 sections length ways, each with its own loft hatch. This maximises space as it means I can have more shelf's on the vertical dividers. The engine hoist will also be in the middle section of the loft hung from the apex of the roof. This means I can lift engines into the loft and lift the engine out of the Minor through the roof.
I have never done building work before so research was required. Things I
needed to know were as follows:
Thickness of concrete for the base, how to do foundations, size of building
blocks, the way a damp proof course is designed, the positioning of
reinforcing piers on the walls, size of available lintels, the design of the
roof, size of timber for the roof, how to attach the roof etc.
I obtained this information by asking friends and looking at existing buildings.
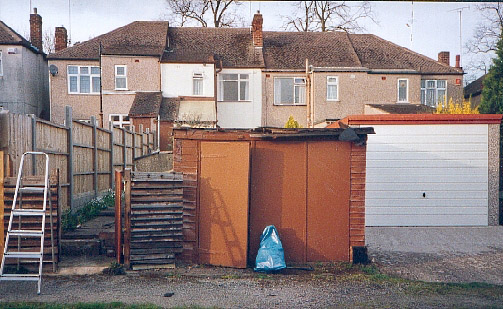
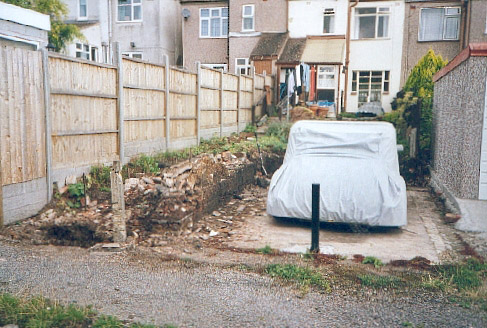
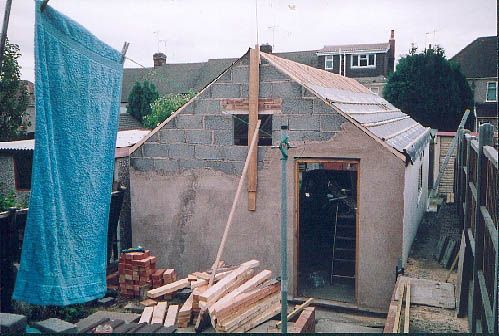
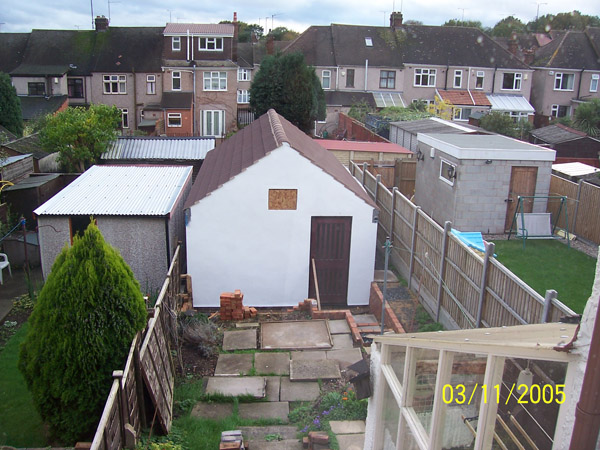
This is the original garage, actually little more than a shed. I did not dare put my car in there in case it collapsed.
---------------------------------------------------------
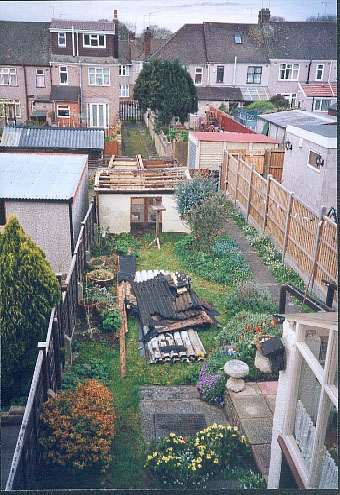
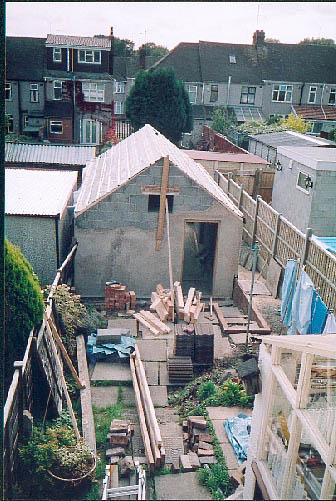
I didnt just attack the garage and wreck it but pulled it down in a methodical manner. Here the roof is coming off.
Notice the entrance directly opposite my garage.
---------------------------------------------------------
The garage had asbestos walls so I had to be careful. Some of the neighbours said I should get
professional disposal people in (££££) but this asbestos is relatively safe and the local council
tip have a skip to put it in.
---------------------------------------------------------
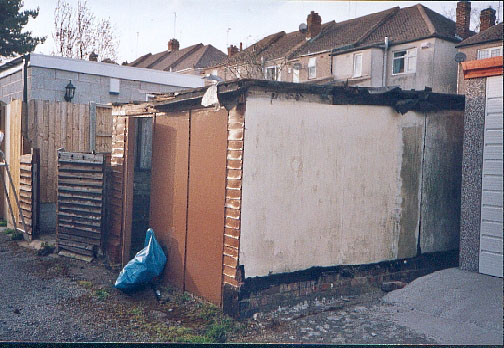
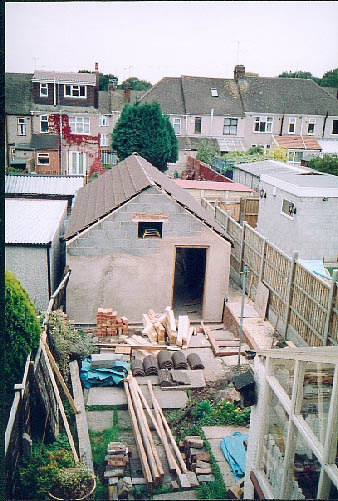
The garage is nearly down. I left the doors in place until last to "hide" just what I was doing.
The asbestos was double bagged and taking to the tip in the back in of my car.
---------------------------------------------------------
Now the garage was down I had a nice hard standing for the Minor.
---------------------------------------------------------
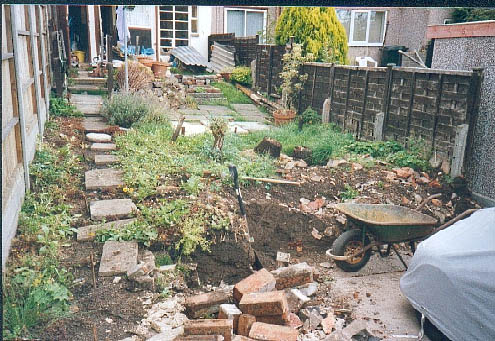
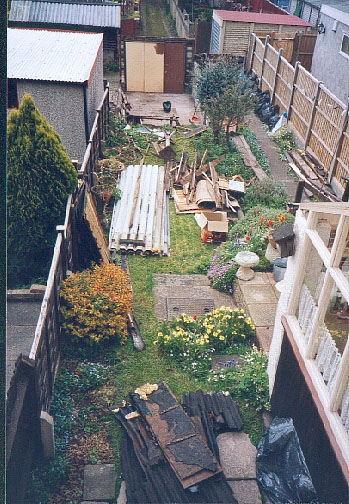
I started digging out and taking walls down by hand the day before I was due to hire a digger.
---------------------------------------------------------
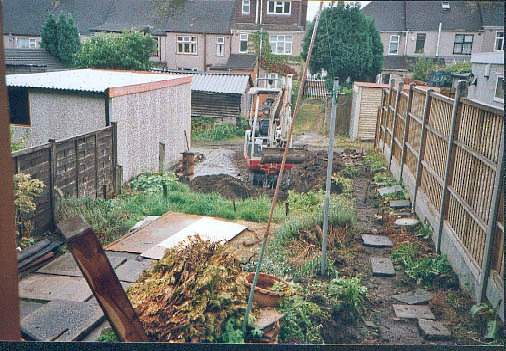
Monday. I took a week off work. The plan was to dig out and get the concrete base in by the end of the week.
I hired a mini digger and small dumper for the day to dig out.
---------------------------------------------------------

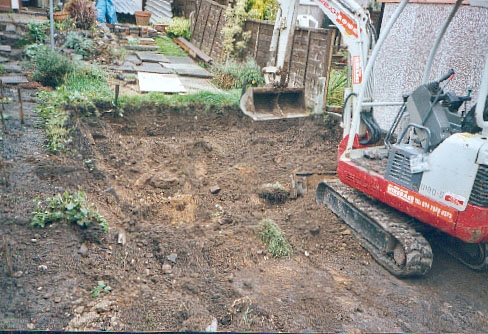
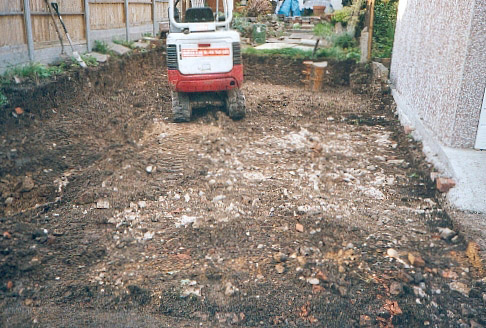
It did not like there was much to dig out......
---------------------------------------------------------
The digger was reasonably easy to control.
---------------------------------------------------------
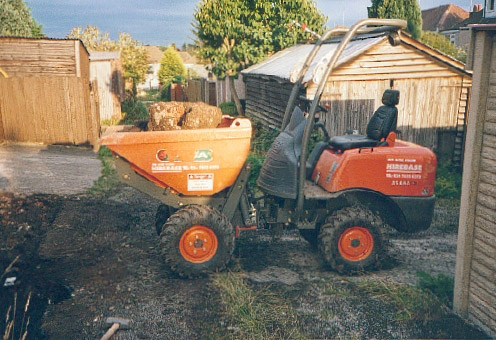
The little dumper. It didnt take many scoops to fill this.
---------------------------------------------------------
I worked non stop all day from when the machines were delivered at 8.30 am until late evening, with no lunch.
I wasnt going to pay for 2 days hire. My neighbour got worried that I was going to knock down his garage
the digger and told me to stop. I kept working.
---------------------------------------------------------
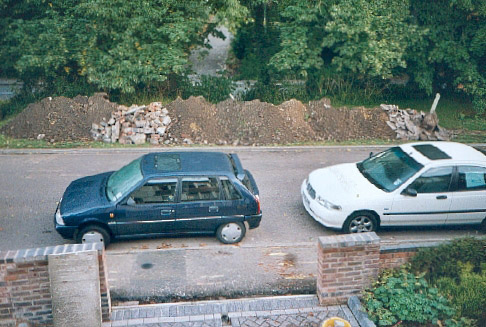
The problem was how to dispose of the soil. Fortunately there is some common land accross the road from my house
so I piled it on there. I would then get a lorry the next day, with a grab to remove it. My neighbour didnt like this pile of
soil either and told
me to stop. The soil was there for less than 24 hours and the lorry was a lot cheaper than skips.
---------------------------------------------------------
Tuesday. I then dug the footings by hand and bagged up the soil. I then took the soil to the council tip
in the back of my Citreon AX. I think I overloaded it as rear wheels now have a lot of negative camber!!
---------------------------------------------------------
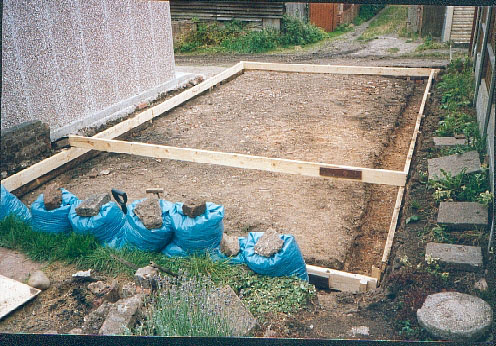
Wednesday. I built shuttering from 6" x 2" timber for the concrete base.
---------------------------------------------------------
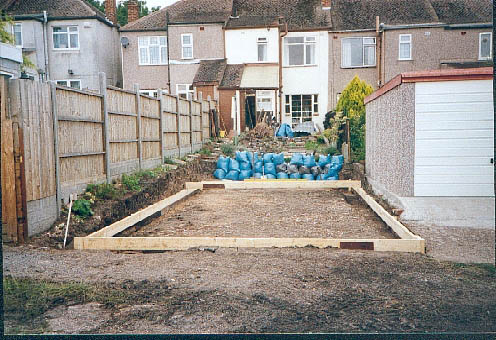
The finished shuttering. I put a lot of effort into making this level as this would dictate just how level
my garage floor would be. The concrete is 300mm deep around the outside and 150mm everywhere else.
---------------------------------------------------------
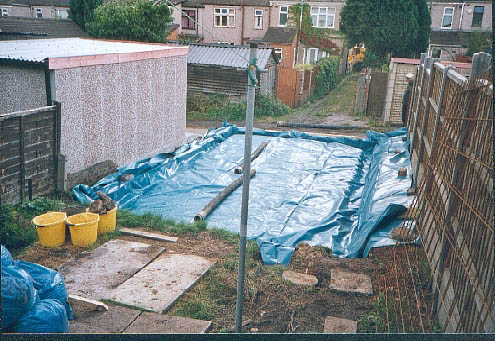
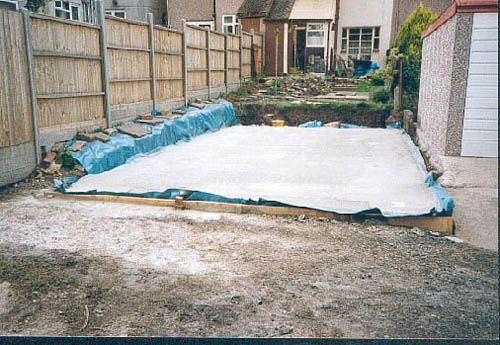
Thursday. I layed thick plastic sheet down for the concrete base.
---------------------------------------------------------
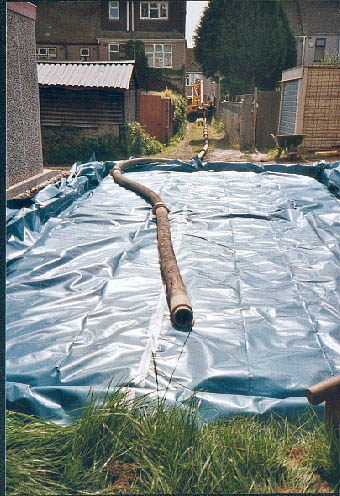
As access is very restricted to behind my house, I could not get a concrete wagon in, so I got the concrete
pumped in. In the background is the pumping wagon. The pumping cost me £180 and was the best cash I ever
spent as it made the job so easy. The guys were very helpful.
---------------------------------------------------------
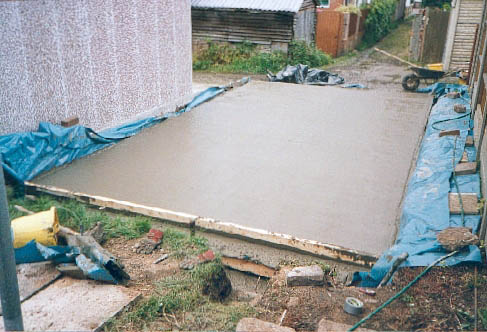
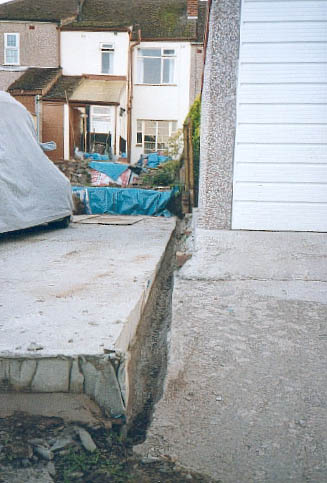
This is the finished concrete base. It took a full wagon (over 6 cubic metres) to make this. There is also steel mesh
reinforcement in the concrete.
Thank you to my friend Darren for helping me tamp the concrete.
---------------------------------------------------------
Friday Morning. The base has now set enough to walk on and I started to remove the shuttering.
---------------------------------------------------------
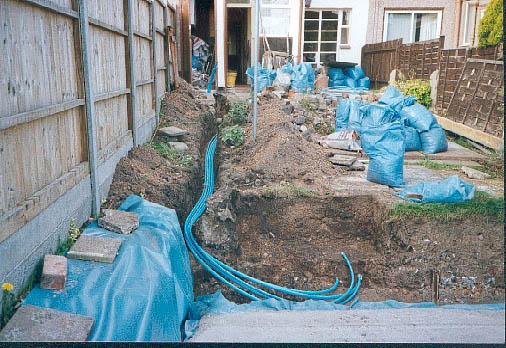
Saturday. To get the services down to the garage I buried water hose. I chose this for several reasons.
It is very impact resistant,
it has a smooth bore so threading wires down will be easier and it is easily avaliable.
---------------------------------------------------------
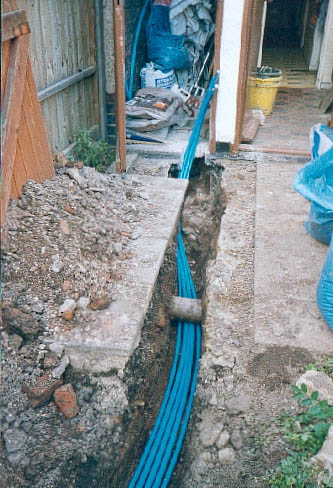
The blue hose passing in under the sewer. It was useful to find the location of this as I am thinking of putting
a downstairs toilet in the coal hose.
---------------------------------------------------------
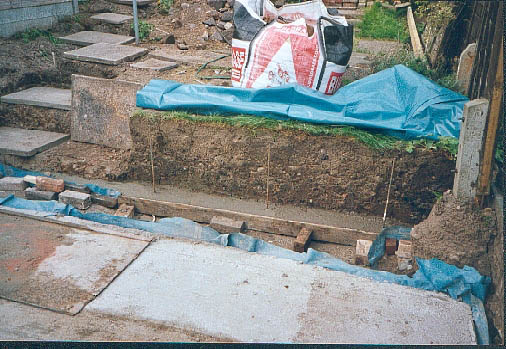
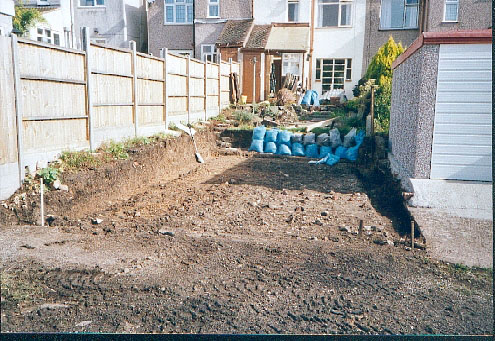
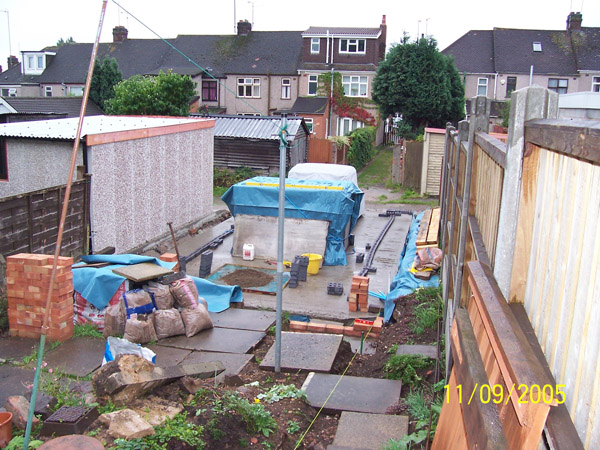
At the back of the garage I needed a retaining wall to hold the garden back. This has
good foundations and steel reinforcement.
---------------------------------------------------------
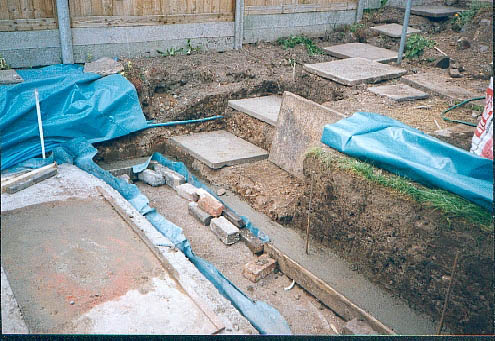
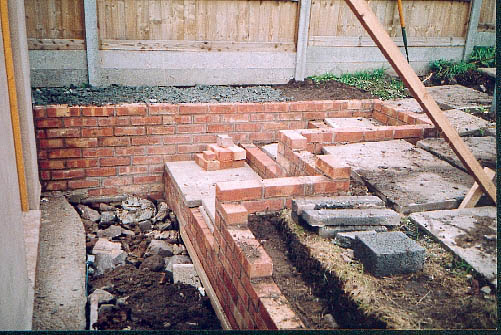
The retaining wall has to incorporate steps. All concrete and cement is mixed by hand on a board.
---------------------------------------------------------
I built a concrete filled gulley between the garages to take away rain water. My neighbour was worried
about me building my garage but I have made things better than before.
---------------------------------------------------------
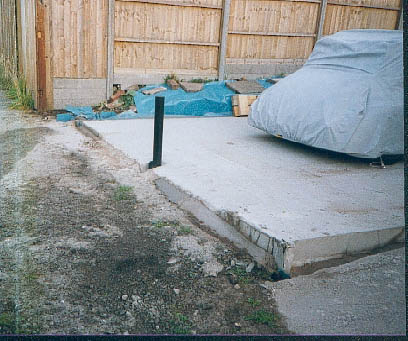
I put a security post in the concrete. The garage door will go down behind this.
---------------------------------------------------------
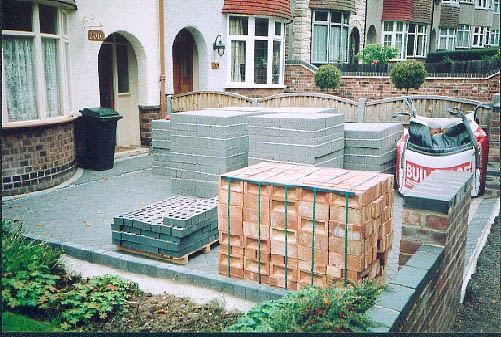
The building materials were delivered and placed on my new drive. I carried all these
blocks through the house and moved the sand by wheel barrow.
---------------------------------------------------------
The first job is to lay a course of engineering bricks (or blues). These are hard and act as a damp proof course.
We then layed normal damp proof course on top of these and started with the blocks.
---------------------------------------------------------
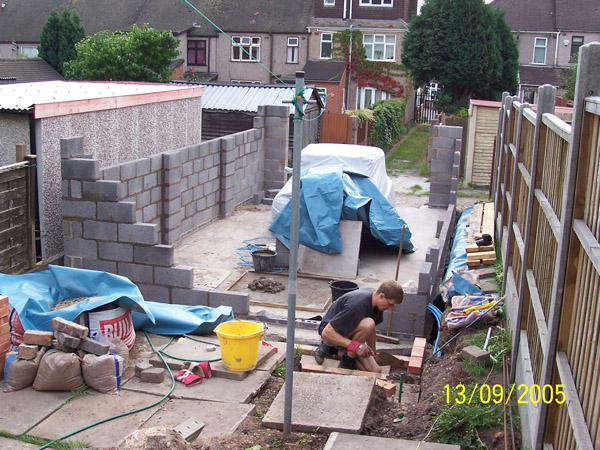
My Dad layed the blocks for me. On long walls you have piers or pillars every 2 to 3 metres. Here I am laying bricks for the garden wall.
---------------------------------------------------------
The corners are built first then the middles filled in. The door frame is positioned with the door in place and
then the blocks layed around the frame.
---------------------------------------------------------
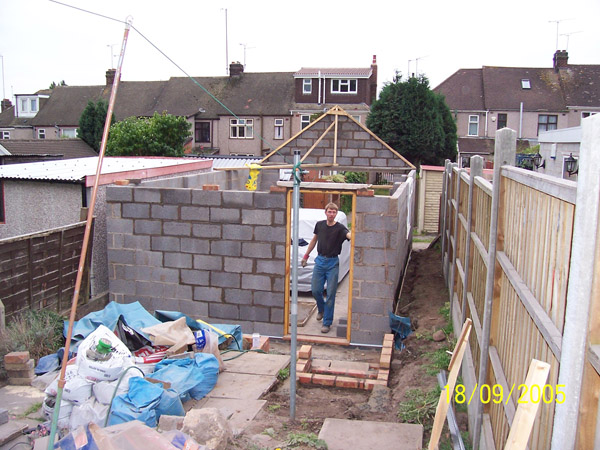
The block work continues to the wall plate level (where the roof starts). I am having gable ends as this
will maximise loft space and make the roof construction easier.
---------------------------------------------------------
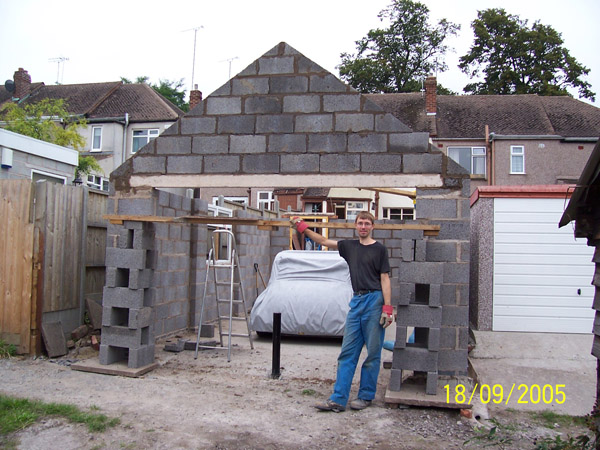
The lintel is a reinforced concrete beam. It may appear quite small but it does not carry much weight.
To reach the top we had to stand on a plank on top of block towers. We built the garage around my Minor!
---------------------------------------------------------
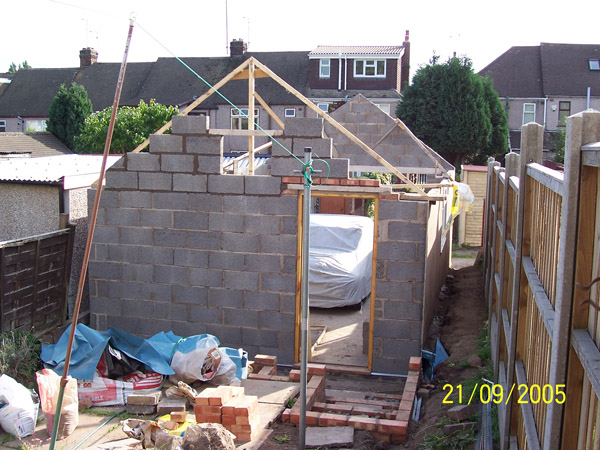
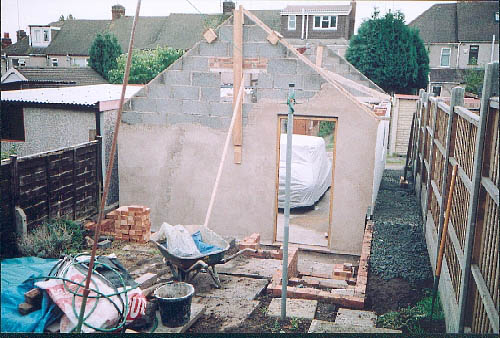
We built the gable ends to the wooden template. The gable ends are braced to stop them blowing over until the roof is built.
---------------------------------------------------------
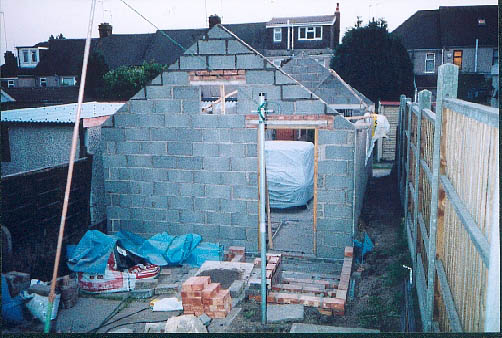
Dad left me a few blocks to lay. These are the ones I put in.
---------------------------------------------------------
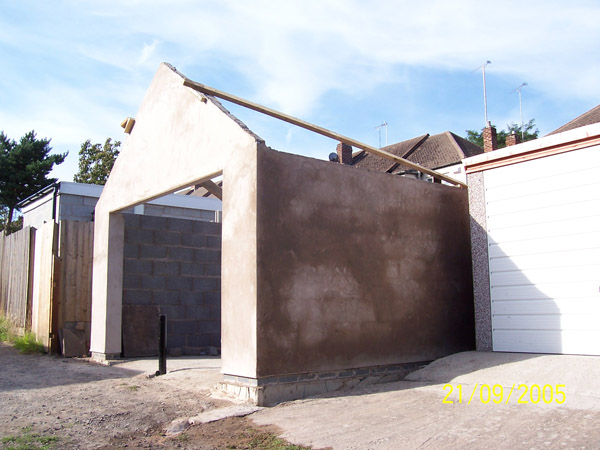
The outside is rendered. Dad did it one coat even though you are supposed to use 2. I will paint the outside.
---------------------------------------------------------
Rendering the outside. Under the soil I painted the conrete blocks with waterproof sealer
and there is plastic sheet lapped up the wall and this goes under the rendering.
---------------------------------------------------------
Dad did most of the rendering but left this end for me to do. Here I have completed
as much as I could reach from the ground. This was the first rendering I have done and it
looked great......until it was painted!
---------------------------------------------------------
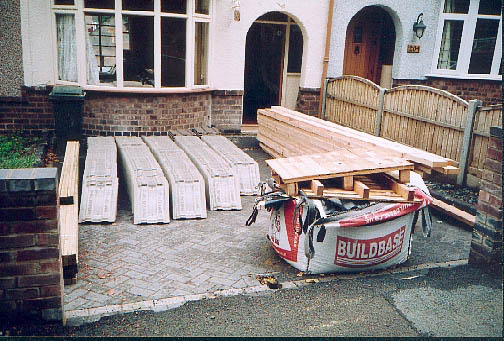
Friday pm. All the roofing materials were delivered onto my now not so new drive. All these were carried through
the house.
---------------------------------------------------------
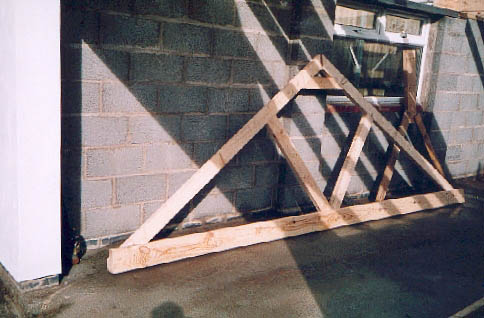
Friday Pm. I constructed 4 trusses, one for each end and another 2 in between.
Note the slot left at the top for the ridge board. I also cut all the joists to length and
every rafter to length with the correct angle on the ends.
---------------------------------------------------------
Saturday. A friend Richard came for the weekend to help me build the roof. I wanted the roof done and waterproof by Sunday afternoon!!
This is one of the trusses in position up against the cable end. The joists were positioned and
nailed to the wall plate.
---------------------------------------------------------
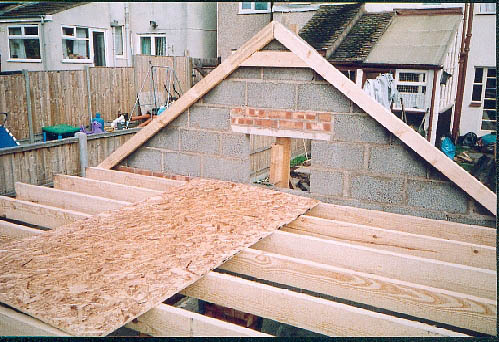
The 4 trusses in position. They each had a slot in the top then I could drop the ridge board in place.
---------------------------------------------------------
Another view of the trusses in place. Building the rest of the roof is now easy.
The precut
rafters are layed up to the ridge and nailed in position. Note the front of the Minor
in front of the garage. I decided it was too risky to leave it in the garage when working above it.
---------------------------------------------------------
First thing Sunday morning. We worked on the Saturday until late using head torches, then went to the pub
and drank too much Old Peculier, which was probably not the best idea when we had a busy Sunday!
---------------------------------------------------------
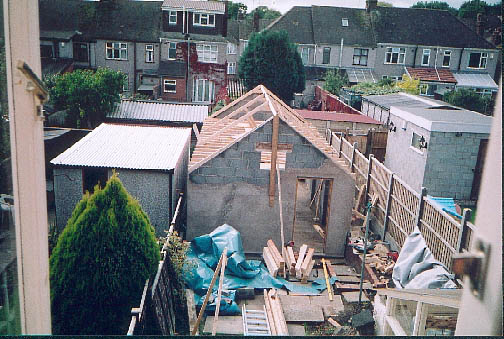
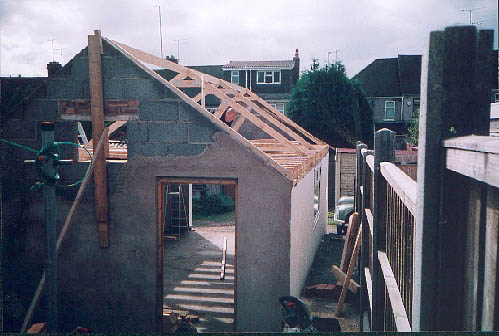
The roof felted and latted.
---------------------------------------------------------
Sunday evening. After 2 days hard work with help from my friend Richard Holmes we had the roof practically done.
Tiling was difficult especially lifting all the tiles onto the roof, without help this would have been very difficult.
---------------------------------------------------------

The garage nearly finished only requiring facia and guttering.
---------------------------------------------------------
An overall view of the garage. The garage takes up a lot of room but there is still adequate garden left.
---------------------------------------------------------
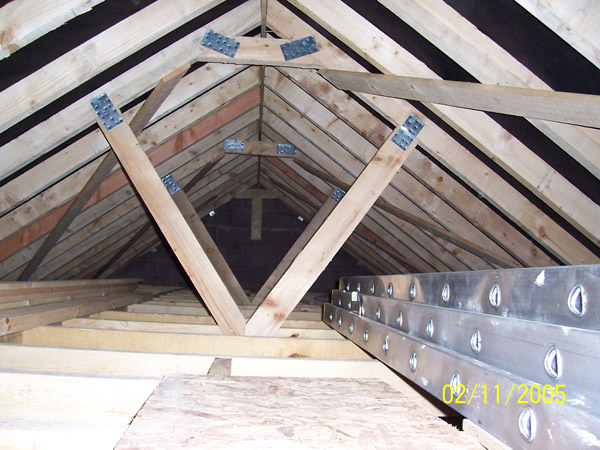
This is inside the loft. The floor will be boarded.
---------------------------------------------------------

The floor of the loft may appear over engineered but I will be storing engines and gearboxes up there.
---------------------------------------------------------
The loft. There is insulation under the floor. I will eventually put shelves on the 2 trusses and
leave a small area to crawl through so I can get to each area of the loft.
---------------------------------------------------------
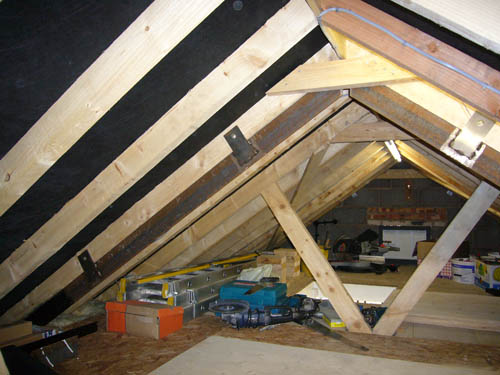
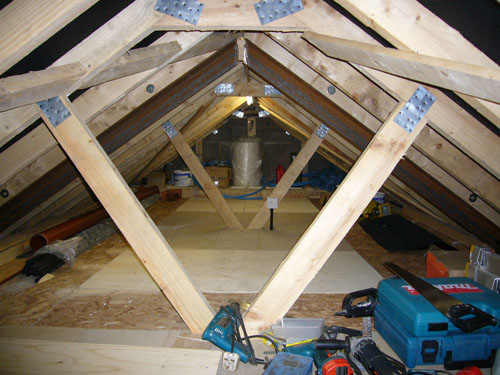
This is the steel frame work. It is angle bolted under a rafter and welded to another piece running just under the wall plate.
I will add another piece of steel in the top of the roof to tie the 2 pieces together and to hang the winch from.
---------------------------------------------------------
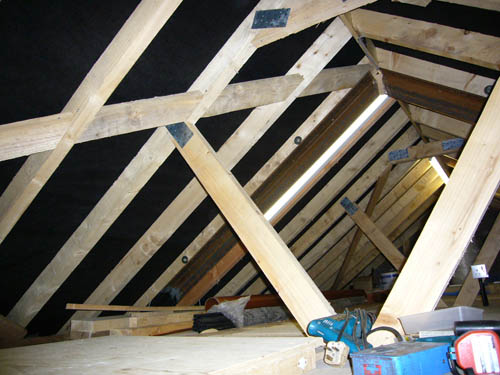
I added a large diagonal in the rafters to support the steel framework. The loft has strip lights
and electrical sockets.
---------------------------------------------------------
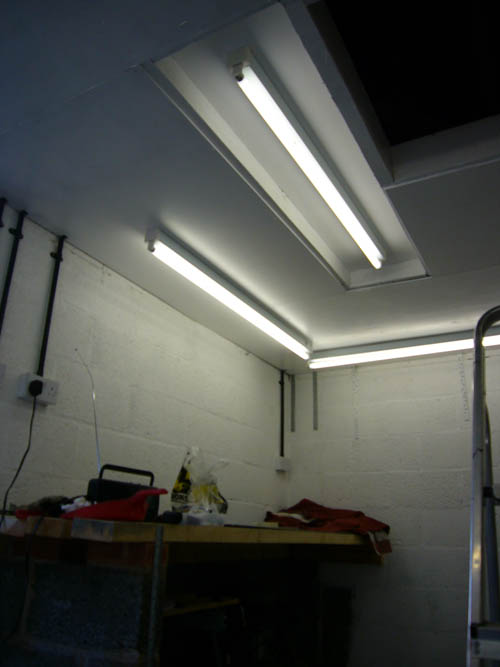
There are plenty of lights around the bench. The lights in the middle of the ceiling are recessed so they do not
restrict head room.
---------------------------------------------------------
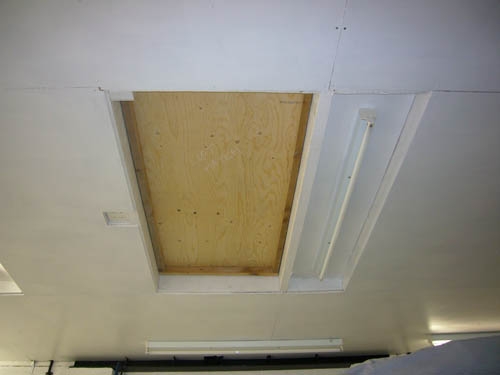
This is the big middle loft hatch. You can see another recessed light to the right of this.
At the bottom of the picture is another strip light and below this sat on top of the pillers is the steel work that is connected
to the pieces in the loft.
---------------------------------------------------------
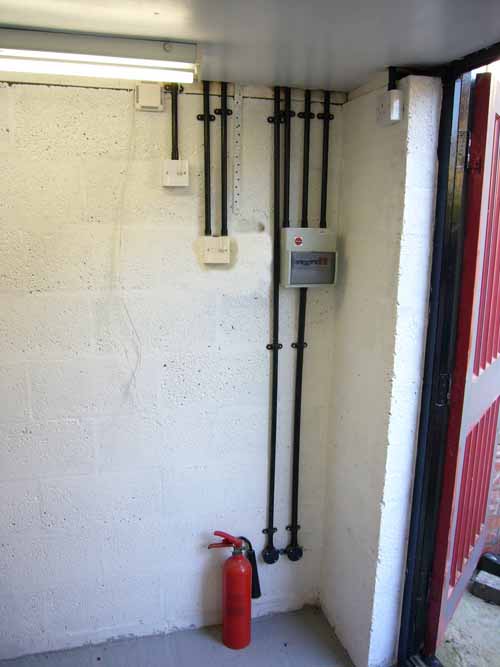
All wiring is in ducting.
---------------------------------------------------------
Outside I continued to build the retaining walls and steps.
---------------------------------------------------------

The retaining wall with steel reinforcment and pillars. This wall will not move!
---------------------------------------------------------
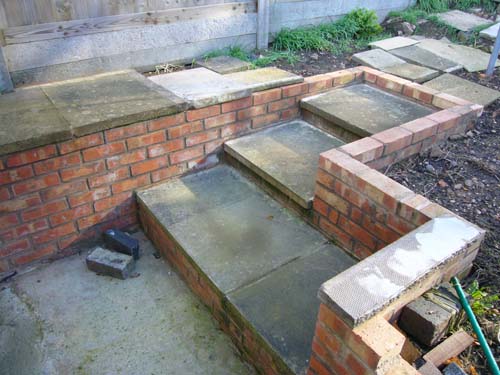
The finished walls and steps. All concrete and cement mixed by hand.
Now I have the rest of the garden to do!
---------------------------------------------------------
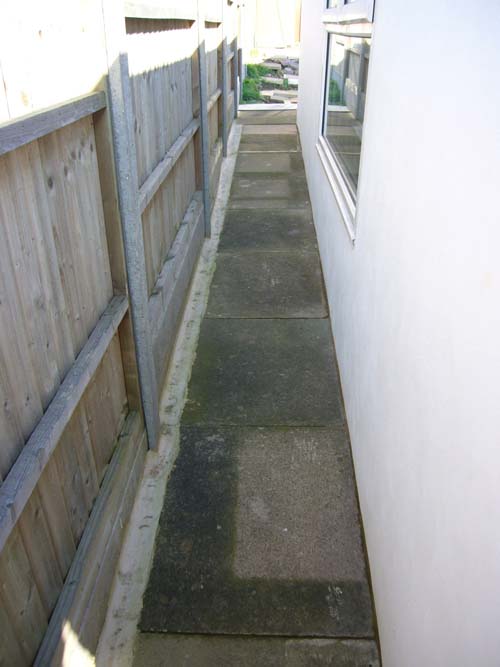
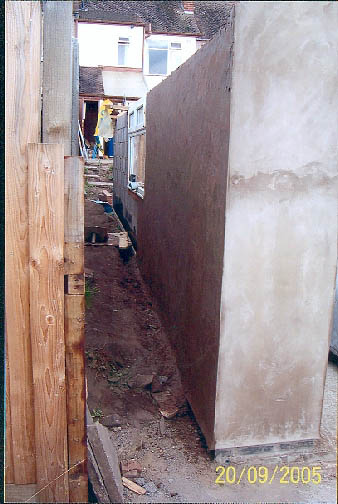
This is the path down the side of the garage. It is wide enough to get a bicycle and wheelbarrow down.
---------------------------------------------------------
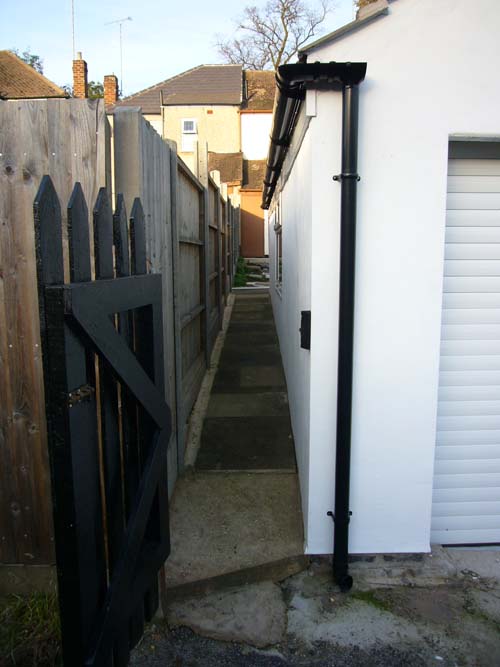
This is looking towards the house and shows the path. The path slopes away from the garage.
Water will
then drain down the small cement gulley near the fence.
---------------------------------------------------------
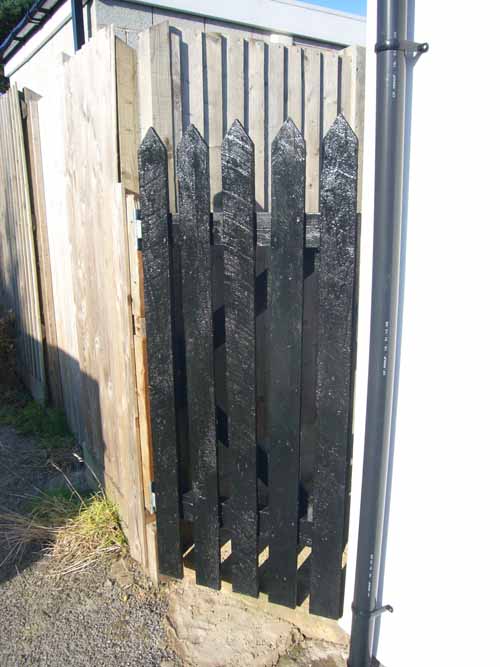
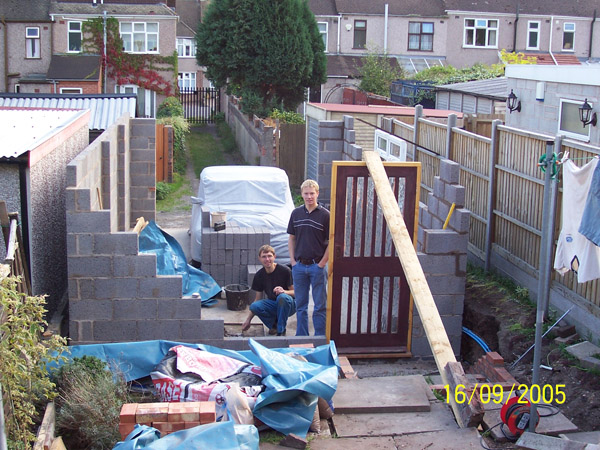
This is a gate I made from a pallet that my building materials were delivered on.
---------------------------------------------------------
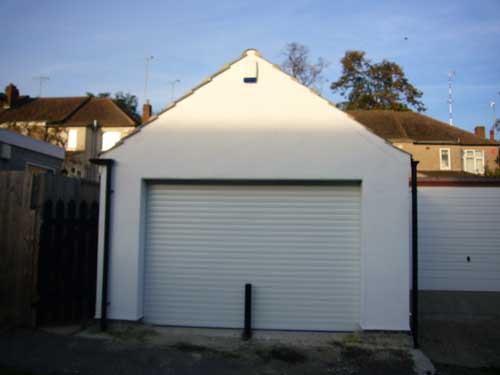
The finished garage. The electrical roller shutter door also has a story. I ordered this on the Monday before Christmas and
it was specially made and delivered on the Thursday. I then fitted
it between Christmas and New Year. Fitting a door
this big on your own took some thought and strength! The garage looks a lot better than the old one that was there
before it. My neighbour is now quite happy especially as he can see how good the garge has turned out.
Notice how my neighbours garage is set back. This is so he can turn into it as the lane at that runs down the back is very narrow.
However the reason I bought my house is it is directly opposite
an entrance so I can drive straight in.